About this guide
A docs-as-code workflow uses plain-text Markdown, version control, and automated builds to create documentation. This guide helps you work with a Prodockit-enabled Zensical site or use prodockit-template as a head start for a new professional website and PDF.
By following the guide, you will be able to:
- write and organise a document in Markdown;
- preview the website and build the PDF on your computer;
- save a recoverable history of the work in GitLab or GitHub;
- collaborate through pull requests or merge requests; and
- publish the website and PDF through an automated pipeline.
This guide is hosted separately from the projects it describes. It can therefore remain current while each project keeps control of its own template, content, and release schedule.
Choose how to install
Choose an installation route in Getting started. It summarises the choices and points to the maintained Prodockit Extensions installation manual. Complete one route there before following the authoring and publishing instructions in this User Guide.
How docs-as-code works
The workflow treats documentation with the same care as software while keeping the writing itself in readable Markdown files.
-
Write
Write the content in Markdown using Visual Studio Code. Editor extensions help check spelling, grammar, and configuration while you work.
-
Preview a website
Zensical turns the Markdown into a local website. prodockit adds the PDF, heading and caption numbering, references, citations, an index, and other features used by professional and academic documents.
-
Save and review
Git records each saved change as a commit, providing a history that can be examined or restored. GitLab and GitHub support pull requests or merge requests when work needs discussion and review before it is accepted.
-
Publish a document
Pushing an accepted change starts a pipeline. The pipeline repeats the build in a controlled environment and publishes the website and downloadable PDF.
How the tools fit together
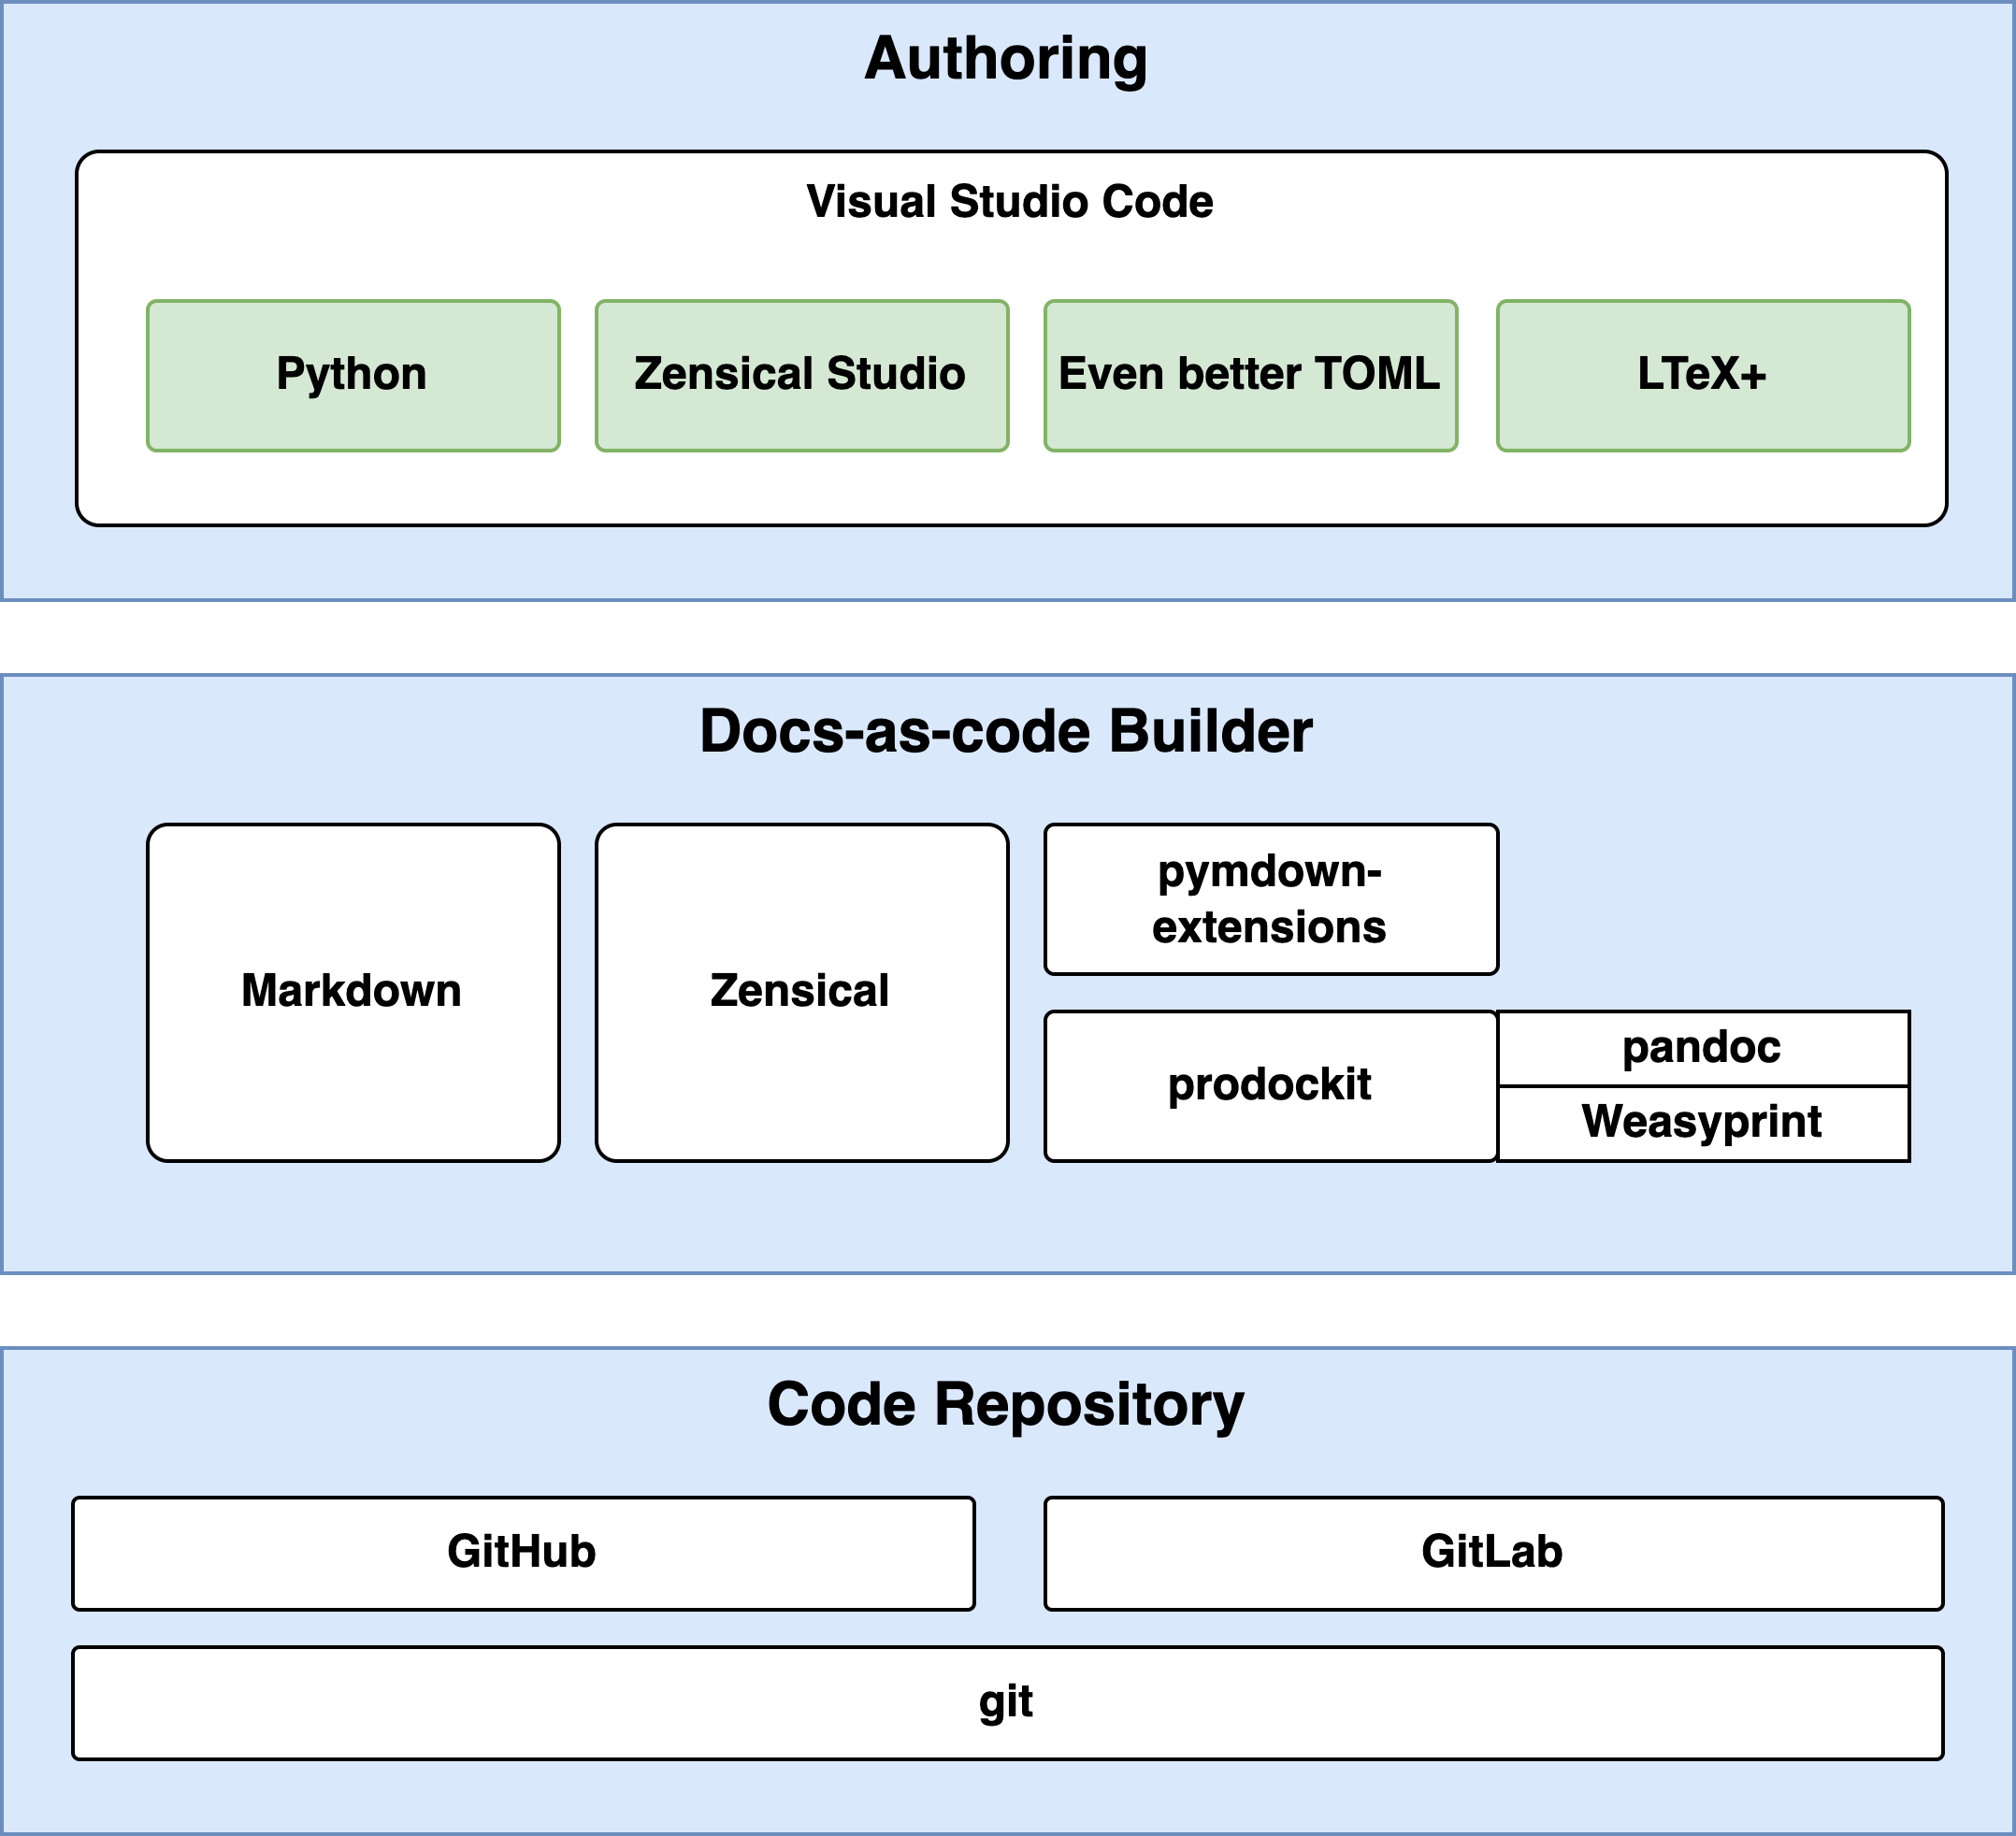
1. The tools in the docs-as-code stack
| Layer | Tools used here | Purpose |
|---|---|---|
| Authoring | Visual Studio Code, Zensical Studio, Even Better TOML, LTeX+, and the Python extension | Write, preview, and check the source files. |
| Building | Zensical and prodockit | Turn Markdown into the website and PDF. |
| Repository and publishing | Git with GitLab or GitHub | Store the history, support review, run the build, and publish its outputs. |
Zensical is the website builder. The prodockit package extends it with the document features and commands used throughout this guide. You can adopt those components into your own project, or use prodockit-template for a ready-to-use formal document structure and publishing configuration. In either case, your repository remains an independent project containing your own work.
Docs-as-code in production
A formal report or small documentation project uses the same core cycle as a large technical-writing team: plan, write, review, build, and publish. The scale and number of reviewers change, but the underlying skills remain useful.
The optional GitLab video below shows that workflow in a production documentation team. It covers planning, writing and reviewing, and deploying and publishing. You can also watch the video directly on YouTube.
Tip
This User Guide is itself built from Markdown using Zensical and prodockit. You can view its source repository to see the files behind the published site.
Follow the guide
After choosing an installation route, work through the guide in this order.
-
Set up the computer and project
Use Getting started to choose an installation path and follow the corresponding Prodockit Extensions instructions.
Additional tooling is an optional follow-on after installation, not another installation path.
-
Learn the writing workflow
Start editing introduces the everyday edit, preview, commit, and push cycle. Markdown basics explains the source format, and Zensical basics covers the general website features.
-
Adapt the template
Use Document appearance and structure for the overall project configuration, Prodockit authoring features for references, tables, figures, and other document features, and Build and publish for website, PDF, pipeline, and dependency settings.
-
Verify and find help
Shell commands explains commands used by the guide, and Build and publish shows how to generate and review the website and PDF. The acronyms, glossary, and references pages provide supporting reference information.
-
Ready to begin?
Choose an installation path, then return here for the writing and publishing workflow.